Showing posts with label Misc. Show all posts

Thursday, July 29, 2010

Fabric Covered 3 Ring Binder

From: http://www.2littlehooligans.blogspot.com/

(Beginner Project: From start to finish project should take about 1 hour.)


Materials Needed:

One 3-ring binder (I used one that was 21" x 11.5")

** You will need to adjust measurements of fabric and stabilizer depending on size of your binder**

2 pieces of iron-on stabilizer: 23" x 12.5"4 pieces of fabric: 13" x 8.5" (for the pockets)2 pieces of fabric: 23" x 12.5" (outside cover of binder)
Trace around binder onto the two pieces of stabilizer and cut out.
Make sure the pieces of stabilizer are the exact size of binder.

Take one piece of stabilizer and fold in half.
Measure three inches from fold and cut.

You now have two pieces of stabilizer that will be used for the pockets.

Should have this.
Gather the fabric pieces.

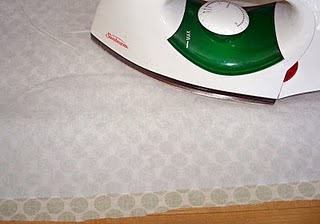
Time to iron on the stabilizer.

Take two pieces of fabric sized 13" x 8.5" and iron stabilizer onto wrong side of fabric.

Take one piece of fabric sized 23" x 12.5" and iron stabilizer onto wrong side of fabric.

Should have this. Don't worry about trimming off excess fabric.
Gather all the 13" x 8.5" pocket pieces of fabric.

With right sides together sew one piece of fabric with stabilizer to one piece without stabilizer. Make sure you sew on the straight edged side. (The rounded edges are the corners of binder.)Repeat for other two pieces.

Turn right side out and iron

Time to layer the pieces.

Place the 23" x 12.5" piece of fabric on table right side up.

Place one pocket piece on far right side and one on the far left side. (Straight folded edge is towards the middle and the rounded edges are on the outside.)

Now place stabilized 23" x 12.5" piece of fabric on top of pockets, stabilizer side up.

Carefully line up fabric so that all the pieces of stabilizer line up perfectly. This part is a little tricky. Pay special attention to the rounded edges of the pockets. You want to make sure all the pieces of stabilizer line up perfectly, if they don't, it may look a little bulky on the edges.

Pin in place.

Leave a 2 1/2" opening in the middle bottom of fabric. (Opening will be used for turning fabric out.)

With using the stabilizer as your guide sew together leaving 1/4" space from stabilizer.

Trim off excess fabric. Reach into hole and pull fabric out. Iron. Hand stitch opening closed.
Place binder into pockets. Now your finished!

Thursday, April 29, 2010

Phone Message Board

From: http://jenthecrazyscrapbooker.blogspot.com/

For this project you will need the following:


1. GCD Pattern Paper (I chose to use the Homespun Chic collection by Melody Ross)
2. GCD Brads (Again I chose to use the Homespun Chic collection by Melody Ross)
3. 6x6 cork board
4. Ribbon
5. A Stapler
6. A 6x6 Shadow Box
7. Scissors
8. Crackle or white paint
9. Sand Paper or a Paper File
10. A Ruler
11. Pen or Pencil
12. Pins

Step 1:


Prep your shadow box. My shadow box came with a hard plastic pane – so the first thing I did was remove it. I then slightly sanded off any imperfections in the wood to prep for painting. I then painted my shadow box and set it aside to dry.

Step 2:

Using your ruler find the center point on your cork board – mark it. Cut off 6 pieces of ribbon large enough to cover the front and wrap around the back of your cork board.

Then take your first ribbon starting in the upper left hand corner and stretch it across your center point to the lower right hand corner. Now using your pins – pin it to each corner so it doesn’t move. Next, take 2 ribbons and place them to each side of the middle – you can either eye ball this or measure it – but you are going to pin these ribbons so that you have even space from the edge and the middle ribbon. Pin and secure. Turn your cork board and repeat the process for the last 3 ribbons (finding center) and then placing the remaining two.

Now take your brads and place them over the top of the 2 intersecting ribbons (see picture) secure these to the back by flatting them out.


Take another piece of cork board and place it on the back side of the first cork board. Pull up each ribbon tightly and staple each strain to the back. Trim off the excess ribbon.


Step 3:

After your box is dried – place your cork board inside and decorate the outside with pattern paper. There you have it – a phone message center that will keep you organized this spring!

Friday, March 19, 2010

Easy Fun Gifts

Idea/Tutorial from: HowDoesShe.com

Materials Needed:

2x4 pieces cut to 8 inches
scrapbook paper
vinal
ribbon
drill
Oreo Suckers


Mod podge on the paper. I used green for grass…polka dot grass…whatever:)

Sand it down. If you want to stain it this is where you’d do it. I didn’t because I didn’t want to:) I thought it looked good with out any stain.

Fresh NAKED wood!

I used the silhouette to cut the flowers and leaves. Aren’t they cute?

Drilled 4 holes. I didn’t measure I just guessed where to drill. I used a drill bit the same size as the the sucker stick.

If you are wondering how to make these suckers the tutorial on how to make them is in this too.


Add your happy spring vinyl!!!


Tie a fat ribbon around the block.

Stick your suckers in and TaDa!!!!

An easy and thrifty {{but they won’t know it}} gift to give to your whomever! It makes me smile…random gift giving. Giving because you are thinking about them, not because it’s a holiday.


Oreo Cookie Suckers


What you’ll need: Oreos, Sucker sticks, Melting Chocolate, Sprinkles, sucker bags, and bag ties.

Melt Chocolate in 30 seconds increments until melted, stir often. {Wilton}

Dip a sucker stick into your melted chocolate. Open an Oreo and gently press the chocolate coated stick into the frosting center. Put cookie back together and press gently… Let dry for a few minutes… Dip both sides of the cookie into melted chocolate. Place on wax paper…

and get decorating… sprinkle… Or drizzle melted chocolate out of a ziplock bag… Let Dry.


Wrap in cute little sucker baggies and twist tie shut…


Wednesday, February 17, 2010

How To Add A Custom Background

Firstly, you need a picture for you background in the .jpg format with an optimal 1024 x 768px size.

You can use a scanned image, a personal photo, a digital scrapbooking paper, or make your own using an appropriate software such as Photoshop or a FREE equivalente software called GIMP. This is the one I tend to use because as I said, it's FREE!! You get the exactly the same functions as Photoshop and it handles pretty much the same too. It's the tool of choice for all the Manga digital cartoonist apparently, so you know it's no rubbish freeware!

Now that you have your image in the right format, let's get started!

Upload you image from your PC to an image hosting site such as Picasa or Photobucket. Both are free and you just sign up and upload away. This is so you get a direct link to the image.

(I have just learned about a great site called Picnik that has amazing photo enhancing and formatting tools. I'm heading over to check them out. Meet me back here for a discussion later?)

Leave this window open for now. We'll come back to it later.

Now open Blogger

Go to Layout

Then click on Edit HTML

Dowload your current template as a backup, just in case you don't like the changes later!

After the download of the template, scroll down the page until you find the following 3 lines of code: (or type Ctrl and the letter F to get the Find box and type "body {" in the box to find the code you want automatically)

body {

background: #ffffff;
margin: 0;


Substitute the above 3 lines with the following piece of code exactly as it is with all the punctuation: Copy and paste in place. 

body {
background:#fff url("post your HTML code of your image from Picasa or Photobucket");
background-position: down-left;
background-attachment: fixed;
background-repeat: no-repeat;
margin: 0;

Now go back to your uploaded image.

If using Picasa: Once your image is uploaded, right-click on it and click "Copy image location"

If using Photobucket: Once your image is uploaded, got to "Share" or click the Blogger icon, then "Get link code" and copy the HTML code for blogs in full

Paste this where you see the red code, within the quote marks.

Now View and see if you like it!

If not, Clear Edits and start again, or stop there.


When you are happy with it, Save Template.

FYI: If like me you want to know what does what...

The #fff refers to the colour of the background behind the image. This is shown when visitors have selected not to view any images on their browser. This is set to white, but you can change it show any colour you wish (refer to Blog Tips for help with colours)

background position = refers to image starting position

background-attachment = Set to fixed to avoid the image scrolling when you scroll down the page. The other option is to use scroll

background-repeat = repeat refers to the appearance of the image. For example, if you use a small jpg file, you will need to repeat it to cover the whole screen. Otherwise your background will appear as a small tile on the screen, and this is not the effect you want! Other option here is no-repeat (or even repeat-x or repeat-y)


Well, there is a lot to get your head around, but don't be afraid. Do it slowly and methodically. When it come to code you have to be anal, sorry :)

That's it for now, and let me know how you get on?! :)