from: http://www.kidnappedbysuburbia.com/
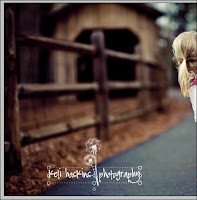
I am not a professional photographer, so I use watermarks solely to protect my images since I’ve found them on other blogs and websites before. If I ever do decide to become a professional, I’ll have a professional logo worked up by a professional, but for now, this one does the trick.
The first thing I did was try to think about something I like … and dandelions came to mind. Okay, I hate that we have 748 of these weeds in our yard rather than beautiful green grass, but I love photographing them, and Emma loves picking and blowing them. And I really do think they’re pretty.
So I decided to find a Photoshop dandelion brush. Brush? What’s that?
Brushes are just that – a sort of digital paintbrush that you can use to create different effects. You can use a paint splatter brush to “brush” a paint splatter on an image using your Photoshop brush tool.
I don’t really know if that explains it very well, but if you keep reading the tutorial, I think it will make sense by the end.
Anyway, a quick Google search was all it took to find a great dandelion brush. I just downloaded the brush set and then installed it into Photoshop Elements 5.0 (I know, it’s ancient, but it works for my needs) using these instructions.
How to http://graphicssoft.about.com/od/pselements/qt/freegoodies.-T0Y.htm Install CustoHow to Use Free Photoshop Content in Photoshop Elements
I had to restart Photoshop once they were installed.
Now, I could have created a transparent image that I can just drag onto each photo I want to watermark to make things about eight thousand times easier, but for the sake of this tutorial, I’m just going to show you how to put the watermark directly onto your photo.
Step 1: Open image in Photoshop
Step 2: Select the brush tool
It may look different in the various versions of Photoshop, but it should look like a paintbrush.
Step 3: Select the brush set that holds the brush you want to use – in my case, the set is called “flower brushes”
Step 4: Select the brush you want to use – in my case, it’s “17” or the dandelion brush
Step 5: Change brush size to suit your needs. You can also change the opacity of the brush if you need to. I left this step out because my dandelion brush is very light already, but if you’re using a heavier brush image, then you might want to make the opacity lighter so it doesn’t take away from your photo.
Step 6: Move brush to wherever you want to stamp it and then click your mouse just once. You won’t be able to “move” it once you stamp it, so make sure you put it in just the right spot the first time (or you can undo and redo it, of course).
Step 7: Once you have it brushed in just the right spot, then you can add your text around it.
Step 8: Change opacity of text, if necessary.
And you’re done!
The great thing about Photoshop brushes is that you can use them for LOTS of things. I used 2 cute little bee brushes to create my personal blog header image, and then I used a bee brush and a bird brush to create my RSS feed and Twitter buttons.
If you use brushes that you’ve found online, please use good etiquette in giving credit. (I put the link to the website where I got my blog header and button brushes in my footer.) Most brush creators don’t require you to give credit, but it’s always nice, IMO.
My favorite place to find free Photoshop brushes is Brusheezy, but you can usually find any brush your heart desires by doing a quick Google search.
My Next Tutorial: creating and saving your own brush so you don't have to create a watermark for every photo!
Thursday, May 6, 2010
Subscribe to:
Post Comments (Atom)


No comments:
Post a Comment