Written by Rachel Durik
Have you ever looked through your pictures thinking, “If only I had just moved this little thing out of the way!”
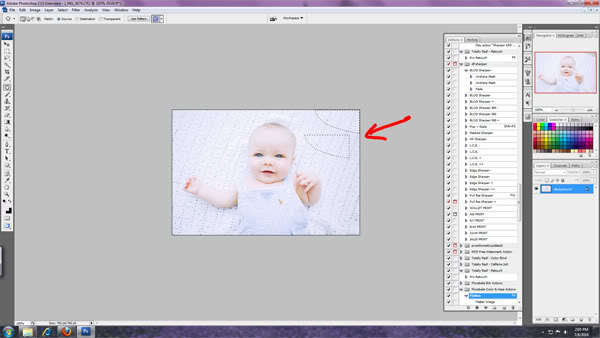
Yes, ideally you get the perfect background in camera. But sometimes you don’t catch something until later. Take this shot. I should have noticed that the blanket didn’t cover the frame entirely. But while I was shooting, I got lost in this little guys beautiful eyes and just didn’t see it until post. In times like this, I use the lasso and patch tools to do a little fix.
I’m working in Photoshop CS3 on a PC.
First, select the lasso tool and make a selection around the area you want to fix. After you’ve lassoed it, click the button on the top toolbar to refine the edge.
Adjust the sliders so that you’ve got a smooth, feathered selection. This will prevent your selection from having harsh, obvious fixed edges.
With your selection in place, click on the patch tool. It’s at the same place your healing brush tool is (which looks like a bandage). Hold the healing brush tool down for a few selections, and you’ll see a drop down menu appear. Select the patch tool. On the toolbar up top, be sure that you’ve checked “Source” for the fix, and not “destination”.
Move your selection to a place with a similar look. In this case, I’m going to choose a nearby patch of blanket, making sure that the lines of the blanket still match up.
When you’ve found the right spot, just release your selection and Photoshop will combine the source and the destination to make a nicely matched fix. Voila!
Rachel Durik is a photographer located in Southwest Florida. You can learn more by visiting her photography site, Savor Photography, Naples Wedding Photographer, the Savor facebook page, and her personal blog
http://www.americanmum.blogspot.com/


No comments:
Post a Comment