Showing posts with label Blogging Tips. Show all posts

Friday, September 17, 2010

4 Easy Steps to Prepare Your Photos for Web Viewing

Have ever finished editing a photo, looked at it and thought “This looks so awesome! I’m in awe of my mad Photoshop skillz!” only to be ridiculously deflated after you upload it to your blog or favorite forum? Yeah. Been there done that… a lot! Ok, well maybe not the whole gloating over my mad Photoshop skillz part! But definitely I’ve disappointed at the lack of zing in my photos.

I think there’s something hidden deep inside the internet insides that loves to zap all the zing out of photos when they’re uploading. Did you know there’s something you can do about it? You did? Well, that’s fantastic! I think I must have been living under a rock all this time, because I just now figured this out. :) So, in case there’s any more of you out there like me, wondering why your photos don’t look as great on the web as they do on your desktop, here is the solution!

It is so super easy to do, and you can do it in Photoshop and Elements!

Step One – First, complete the edits you’d like to your photo. Then resize your photo to the size you’d like for your blog or forum, ect.

Step Two – Next, click on File > Save for Web & Devices (for Photoshop) or File > Save for Web (for Elements).

Step Three (Photoshop) – Now you should have a box that looks like this in Photoshop. By default, it should be set to Optimized. That’s where I leave it. Next, make sure you have JPEG selected, then click on Save.


Step Three (Elements) – This is what the box will look like in Elements. By default, it has GIF selected, so just click on the drop-down menu and select JPEG. Just under that menu, you’ll find the Quality setting. I set that to Maximum and it automatically sets it to 100. Now click on OK.


Step Four – Next, name your file and save it to the location you’d like on your computer.

That’s it! Now you can upload your photos to the web and they’ll look just as they did on your desktop!

Tuesday, August 10, 2010

Making Money Blogging

Fonts are a VERY IMPORTANT part of any project - and in my opinion, using the right ones can take your project from drab to fab!

"Where did you get that font?"

Some people collect figurines or stamps... I obsessively collect fonts. I have hundreds of them and know each one by name and am always on the lookout for something new and unique. There a great selection of free font sources that any new or old font addict should know about!

The first is SCRAPVILLAGE http://www.scrapvillage.com/

They have a huge, very diverse collection of free fonts that download very easily. Spend a little bit of time on their website and you'll end up with a nice collection of unique fonts of your own! I think you should be able to find most of the ones shown above on their site.

My second "GO-TO" font spot is Fonts For Peas...

http://www.kevinandamanda/com an awesome website where font creator and blogger, Amanda, takes handwriting samples and turns them into free fonts for font addicts like us! She has a huge selection, sure to fit the needs of any digital project you have going on. If you are looking for fancy, cursive, trendy, perfect print or whimsical - she's got it.
Pea Fonts add a more personalized touch for journaling entries on scrapbook pages and definitely can give any project or blog design a fun creative edge. Amanda also has another font collection HERE that any crafter, blogger or scrapper would love! A couple of my other favorites you might want to browse are Sugar Frog Fonts & Two Peas Free Fonts.

NEED HELP INSTALLING NEW FONTS?

Everyone's computer is different... but here's how I do it on mine, I'm a PC:

"Click" on the font you want and a download box will pop up. Click "Save" (I usually choose to save it directly to my desktop. That way, it doesn't get lost in the abyss of my C: drive).

Then, to "install" it, open and extract the zip file (point your cursor on the file, right click and choose "Extract File")

A new file folder (without a zipper) will appear on your desktop. Open that folder, then copy or "drag and drop" the actual “TrueType” font file into your Windows Font Folder. You should be able to find your font folder at: C:/Windows/Fonts

Once a font file is saved into your Windows Font folder... it is essentially, "installed" and should be available to use in any program on your computer! YIPPEEE!

http://www.mycomputerismycanvas.blogspot.com/

The Business of Blogging (part 1)  http://www.totallytogetherjournal.com/the-business-of-blogging/

Figuring Out Your Internet Voice  http://www.totallytogetherjournal.com/figuring-out-your-internet-voice/

Writing for Search Engines Doesn't Mean Selling Your Soul http://www.totallytogetherjournal.com/writing-for-search-engines-doesnt-mean-selling-your-soul/

Is Self-Esteem Tied Into Site-Meter? http://www.totallytogetherjournal.com/is-self-esteem-tied-into-sitemeter/

Social Media and Time-Management (an oxymoron?) http://www.totallytogetherjournal.com/time-management-and-social-media-an-oxymoron/

Further info you might enjoy can be found on http://www.savvyblogging.net/

Wednesday, August 4, 2010

PDF files in Blogger (and other blog stuff)

Blogger. Blogspot. Whichever. Both. Same thing. It’s where I started. It’s where I remain.

I’m not a techie, seriously. I know I’ve somehow managed to impress a few of you with that whole e-mail button gadget thing, but seriously, I can’t even remember how I ever figured that out in the first place, but I’m sure I read about it somewhere online. Though I wish I did, I simply don’t have it in my budget to hire someone to walk me through all the technical blogging ins and outs. I believe I’ve got my post content pretty nailed down, but too often I need to figure out some way of modifying my blog outside of the basic Blogger constrictions. Such as converting to 3-columns (which is now available from Blogger, awesome), or tightening the space between my sidebar gadgets, adding a signature to my posts, and adding other stuff here and there. Typepad and Wordpress have features available that Blogger doesn’t, but they both seem so much more complicated to me. Blogger is so user friendly and everything I needed to learn outside of what they can offer me I have found by Google searching my questions, for example, “How to hide the Google Navigation bar on my blog”. There are always answers and usually if you patiently search a while you can find very simple tutorials on tinkering around with the HTML of your blog, whether you (like me) understand the whole HTML thing or not.

When working on your blog’s design/layout, you should always save a copy of your HTML as it is before you start messing with it, in case you goof up. Blogger allows you to download a full template of your HTML, but I usually cut and paste the entire HTML section into an email draft, date it and save it. Then if I get confused and have already changed my code for good, I can always go back and replace it with my earlier version. The best thing to do, of course, when tinkering with your HTML is to only preview the changes, and not save them until you’re completely sure you like it.

My biggest challenge to date is posting PDF files of graphics in Blogger. Files in PDF format allow me to share vector* graphics (line-art) for those of you that want to manipulate the artwork with your design software. JPEG (raster*) files are great for images such as photos or scanned vintage postcards, for example, that can be altered with photo editing software. But enlarging a JPEG image from the original file size can create an ugly problem.

*If you’re not familiar with vector files or what they are for, check out the podscast from CreativeCow.net.

Other blog platforms, such as Typepad and Wordpress allow you to do this effortlessly. Unfortunately, hosting PDF files is not an option for Blogger. And since there’s no EASY button on your computer, I’ve resorted to using 3rd party sites to host my PDF files. I’ve created a Google Group which allows me to upload PDF files and share their link from my blog post. The problem with that is that when the PDF file is being accessed by more than one person at the same time, it jams all up and someone gets a “bandwidth exceeded” notice and they are unable to access the file. Then I get emails.

It was recommended on several blogs I’ve read to use the site Scribd for sharing PDF files. It’s a pretty fun site- you can upload your files and direct peeps right to your files hosted there. That works great for me, but I have no doubt it annoys some of my readers to have to sign up with Scribd just to get the files. Then, today, I received a comment on one of my older blog posts noting that Scribd was charging a fee for the “archived” file. Yikes! That’s no good!

So, until the blog police come knocking on my door, or my new brilliant idea goes down in a ball of flames due to some glitch I can’t imagine at this point, I have created my own solution for hosting PDF files for immediate download from my Blogger blog. Are you ready for this- I created an entire new blog over in Wordpress just for the sake of uploading PDF files. THAT I can figure out on WP. Once I upload them on WP, I grab the URL of the PDF and paste it as a link to the just for-show-JPG-image or thumbnail I’ve placed in my blog post on Blogger.

Did that make sense?

And by the way, it certainly can’t hurt to claim your blog’s name on the other blog platforms out there just for safe-keeping. Again, I may be summoned to appear in blog court over all of this manipulation of blog sites, and I really don’t want to cheat the system illegally (bloggerly speaking,) but I’m kinda patting myself on the back for finally coming up with a solution to the no PDF file hosting problem with Blogger. (Likely others have been troubleshooting this way before me and I’m not all that ingenious after all.)

So, now the work begins...I will slowly but surely go back into all my previous posts and change out the PDF downloads to be accessed through my new Wordpress blog. Ultimately, you shouldn’t notice anything but ease now when clicking on free PDF images to download, no re-direction, no sites to sign up with, just a click to download. However, this could take months for me to do as I will get to each file as I can, in and out of projects and other life commitments, so thank you in advance for your patience in dealing with the files as they are.

To get the party started, here’s a PDF file for you to try out. Click on the image and let me know how it goes.

And... an important reminder for you bloggers, crafters, artists, designers out there:

Start branding your name TODAY!

• Create a blog with YOUR name on it, like I did: catheholden.blogspot.com . It’s free, and even if you already have a blog by another name, get one or more with your name. You don’t have to use it right away, or I suppose- at all, but it’s there when and if you need it one day, or to keep others from snagging it should you become famous, (if you’re not already.)

• Register a domain name with your name, such as catheholden.com, assuming you have a name that isn’t too common and already taken. Your name IS your ultimate brand, start owning it. I use GoDaddy.com to host all of my domains, cheap. They have a toll free number, pick up the phone and talk to a real person who can walk you through purchasing your domain and answering even your lamest, most rookie questions, they are GREAT!

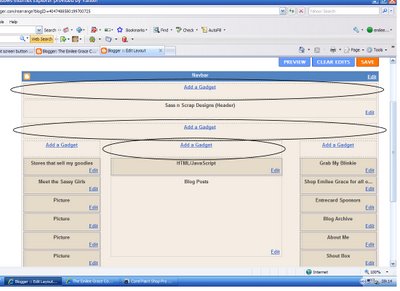
Oh, and you Blogspot Bloggers- here’s another little nugget that took me way to long to figure out, but finally did with the help of my Typepad friend, Apron Thrift Girl: How to create multiple pages in Blogger. The solution is crazy simple: when signed in, go to blogger in draft. On your DESIGN page, you’ll find a gadget for PAGES in the layout!

UPDATE: The first two comments to this post brought up the question of creating posts for a later date. It’s easier than you think, click on my image below!

Thursday, May 6, 2010

How to Create a Watermark

from: http://www.kidnappedbysuburbia.com/

I am not a professional photographer, so I use watermarks solely to protect my images since I’ve found them on other blogs and websites before. If I ever do decide to become a professional, I’ll have a professional logo worked up by a professional, but for now, this one does the trick.


The first thing I did was try to think about something I like … and dandelions came to mind. Okay, I hate that we have 748 of these weeds in our yard rather than beautiful green grass, but I love photographing them, and Emma loves picking and blowing them. And I really do think they’re pretty.

So I decided to find a Photoshop dandelion brush. Brush? What’s that?

Brushes are just that – a sort of digital paintbrush that you can use to create different effects. You can use a paint splatter brush to “brush” a paint splatter on an image using your Photoshop brush tool.

I don’t really know if that explains it very well, but if you keep reading the tutorial, I think it will make sense by the end.

Anyway, a quick Google search was all it took to find a great dandelion brush. I just downloaded the brush set and then installed it into Photoshop Elements 5.0 (I know, it’s ancient, but it works for my needs) using these instructions. 

How to http://graphicssoft.about.com/od/pselements/qt/freegoodies.-T0Y.htm  Install CustoHow to Use Free Photoshop Content in Photoshop Elements
I had to restart Photoshop once they were installed.

Now, I could have created a transparent image that I can just drag onto each photo I want to watermark to make things about eight thousand times easier, but for the sake of this tutorial, I’m just going to show you how to put the watermark directly onto your photo.

Step 1: Open image in Photoshop

Step 2: Select the brush tool

It may look different in the various versions of Photoshop, but it should look like a paintbrush.


Step 3: Select the brush set that holds the brush you want to use – in my case, the set is called “flower brushes”


Step 4: Select the brush you want to use – in my case, it’s “17” or the dandelion brush

Step 5: Change brush size to suit your needs. You can also change the opacity of the brush if you need to. I left this step out because my dandelion brush is very light already, but if you’re using a heavier brush image, then you might want to make the opacity lighter so it doesn’t take away from your photo.


Step 6: Move brush to wherever you want to stamp it and then click your mouse just once. You won’t be able to “move” it once you stamp it, so make sure you put it in just the right spot the first time (or you can undo and redo it, of course).


Step 7: Once you have it brushed in just the right spot, then you can add your text around it.

Step 8: Change opacity of text, if necessary.

And you’re done!


The great thing about Photoshop brushes is that you can use them for LOTS of things. I used 2 cute little bee brushes to create my personal blog header image, and then I used a bee brush and a bird brush to create my RSS feed and Twitter buttons.

If you use brushes that you’ve found online, please use good etiquette in giving credit. (I put the link to the website where I got my blog header and button brushes in my footer.) Most brush creators don’t require you to give credit, but it’s always nice, IMO.

My favorite place to find free Photoshop brushes is Brusheezy, but you can usually find any brush your heart desires by doing a quick Google search.

My Next Tutorial: creating and saving your own brush so you don't have to create a watermark for every photo!

Thursday, April 29, 2010

Menu Bar

from: http://www.thegirlcreative.blogspot.com/

{Blogging Tip #3 - How to Add a Menu Bar - Part TWO}

Now that you know how to add more page elements to your blog, I'm going to take you one step further. Here are instructions on how to actually add the menu bar graphics that I talked about in this tutorial.

Just to recap Part One, your layout tab should now look like this:


Right below your header (or above if you want) is where you are going to add your menu bar. The first thing you need to do is open up your photo editing software. I use Paint Shop Pro. Others use Photoshop. You can even download a free program called Paint.net. Now you are going to create your graphics. As you can see on my blog, I just used plain words in the fonts that I love. Your menu bar can contain links to anything you want. It can link to certain pages in your blog. It can link to your store if you have one. It can link to another blog. Pretty much anything that has a url, it can link to. **You are going to have to play around with the size of each button depending on how wide your blog is and how many menu buttons you want. I used 200px by 50px and it worked out fine for my blog.

Once you have all of your graphics created, you now need to upload them to a site like Photobucket so that it can generate the HTML code that you will need when adding a gadget. Once you do that you will see 4 codes below each of your graphics. The one you want to click on and COPY is the HTML code as pictured below.

Once you have copied that code, you are going to go into your layout tab in blogger and "Add a Gadget". When this box comes up, you are going to select HTML/Java Script. *Note:You are not going to name your gadget. If you do, it will show up above your menu bar and it won't look right. Leave the "Title" blank.


A box will come up and here is where you are going to add all of the HTML codes that you have copied from Photobucket (one at a time) to make your menu bar.

You will add the codes for all buttons in this one box. Once they are all added, you will put the following in front of the first (and only code): and then after the very last code you will put: . Doing this will center your menu bar to your blog.

Still with me?? We're almost done! Feel free to save and take a look at your blog. If it's to your liking, it's time to move on to linking each button with the page of your choice.

Now that your menu bar is in place, you are going to go back in and EDIT. Notice where it says "Rich Text" in blue? Click on that.


Now you should be able to see all of your nice menu button graphics.

Click on each one and then click on the icon that looks like a little world with a chain on top (it's right next to the "i". A box will pop up and here is where you enter the url of the page you want that particular button to link to. Click OK. Once you are finished doing this to each link, click SAVE. You're done!


How do you make the link come up in the current window instead of opening a new one?

The problem is that I can't link more than one post to each button. Like, I have a "recipes" button, but I can't get it to link to all of my recipes, just the one post.
Answer: you need to make sure that within your code the target says _self for same window. If you want it to open in a new window you'd use _new. Hope that helps! :)

Restorative Living - what you need to do is give your recipes all the same label. For example, give them all the label "receipes". Then when you are at your own blog, click on the label "recipes". This should bring up all of your posts using that label. Copy the url from your browser and use that to link your button up to. From there on out, when someone clicks on your recipes button, all of your posts that use the label "recipes" will come up. Hope that makes sense. Let me know how it goes. :)

Friday, April 9, 2010

How to Add a Signature to your Posts

From: http://birdcrafts.blogspot.com

Blog Tips:

This Blog Tip assumes you already have an image you want to use as your signature, so here goes:

Upload you image (signature) to an image hosting site like Picasa or Photobucket.

If using Picasa: Once your image is uploaded, right-click on it and click "Copy image location"

If using Photobucket: Once your image is uploaded, got to "Share" or click the Blogger icon, then "Get link code" and copy the HTML code for blogs in full (with .jpg, .png or .gif)

As show above:

Login to your Blogger and go to "Dashboard"

Then click on the "Settings" tab

Click on "Formatting"


Scroll to the bottom of the page where it says "Post Template" as above

Paste the image code into the white box and click "Save Settings"

Now test it! Your signature should appear automatically everytime you write a post.

Wednesday, March 10, 2010

Blogger Tips

Blogger Tips From thegirlcreative.blogspot.com

{Blogging Tip #1 - How to Center Your Header}

On my many many travels to various blogs here and there I've been seeing a recurring problem on many blog headers. I know that when I was figuring out all the ins and outs of blog design enough to get me by it would drive me nuts when things just didn't look right on my blog: not enough space between sidebars, my header being off-centered, borders in places that I didn't want them, etc. I imagine that I'm not the only one that is bothered by that stuff so here's a quick fix for one major blog design problem: centering the header.


I'm not sure if you can see it but the arrow on the left is pointing to a light gray border and the arrow on the right is to show you how the header is outside that border. Not good. Fixing this problem is actually pretty simple. The first thing I do is remove the border altogether. That's just a matter of preference really but since this is my blog, we'll do it my way. lol

Step 1 - Removing Border from Header

• Go to your "Layout" tab and click on "Edit HTML"
• Find this block of code:

#header-wrapper {

width:660px;

margin:0 auto 10px;

border:1px solid $bordercolor;

}

#header-inner {

background-position: center;

margin-left: auto;

margin-right: auto;

}

#header {

margin: 5px;

border: 1px solid $bordercolor;

text-align: center;

color:$pagetitlecolor;

Anywhere you see border: 1px in this section, change it to 0px (that's a zero, not an "oh"). That will remove the border from around the entire header.


Step 2 - Centering Header

• While still in "Edit HTML" mode, find this block of code:

#header img {

margin-$startSide: auto;

margin-$endSide: auto;

}

ADD THESE 2 LINES RIGHT BELOW margin-$endSide: auto;

position: relative;

left: -25px;

So now your code should look like this:

#header img {

margin-$startSide: auto;

margin-$endSide: auto;

position: relative;

left: -25px;

}
Here's the only somewhat tricky part and by tricky I mean you may have to play around with the numbers a bit. See where it says -25px;? You may have to adjust the numbers less than -25 or maybe more than -25 to get it closest to the center on your particular blog. Make sure you "PREVIEW" before you save. Wallah - you're done. :)

{Blogging Tip # 2 - How to Add a Menu Bar - Part ONE}

I really like learning new things about blogging.  One of those new things that I had recently learned was blog design. I found a tutorial on blog designs on a blog that had a cute idea for a craft.  I thought OK...I'll give it a try!  She was sharing this little tutorial on how to add a menu bar (and a few additional widgets - or gadgets they're now called) to your Blogger layout. If you want your layout to look like the image below (circled items are the ones that will be added to your existing layout), follow these easy steps.


Login into your Blogger account.

Click on the Layout tab.

Click on Edit HTML

Press Ctrl+F to open up the "Find" box

Type showaddelement (all one word)

You will see something like this:


Everywhere that it says 'no', you are going to change to 'yes'.

**ONLY WHERE IT FOLLOWS showaddelement. There should be about 3 places that you are going to change it from 'no' to 'yes'. You will probably have to scroll down a tiny bit to change all of them.

Click Save Template

You are done! You are now able to add a widget above your blog posts, under your blog heading (or above it).

{Blogging Tip #3 - How to Add a Menu Bar - Part TWO}

Now that you know how to add more page elements to your blog, I'm going to take you one step further. Here are instructions on how to actually add the menu bar graphics that I talked about in this tutorial.

Just to recap Part One, your layout tab should now look like this:

Right below your header (or above if you want) is where you are going to add your menu bar. The first thing you need to do is open up your photo editing software. I use Paint Shop Pro. Others use Photoshop. You can even download a free program called Paint.net. Now you are going to create your graphics. As you can see on my blog, I just used plain words in the fonts that I love. Your menu bar can contain links to anything you want. It can link to certain pages in your blog. It can link to your store if you have one. It can link to another blog. Pretty much anything that has a url, it can link to. **You are going to have to play around with the size of each button depending on how wide your blog is and how many menu buttons you want. I used 200px by 50px and it worked out fine for my blog.

Once you have all of your graphics created, you now need to upload them to a site like Photobucket so that it can generate the HTML code that you will need when adding a gadget. Once you do that you will see 4 codes below each of your graphics. The one you want to click on and COPY is the HTML code as pictured below.


Once you have copied that code, you are going to go into your layout tab in blogger and "Add a Gadget". When this box comes up, you are going to select HTML/Java Script. *Note:You are not going to name your gadget. If you do, it will show up above your menu bar and it won't look right. Leave the "Title" blank.


A box will come up and here is where you are going to add all of the HTML codes that you have copied from Photobucket (one at a time) to make your menu bar.

You will add the codes for all buttons in this one box. Once they are all added, you will put the following in front of the first (and only code): and then after the very last code you will put: . Doing this will center your menu bar to your blog.

Still with me?? We're almost done! Feel free to save and take a look at your blog. If it's to your liking, it's time to move on to linking each button with the page of your choice.

Now that your menu bar is in place, you are going to go back in and EDIT. Notice where it says "Rich Text" in blue? Click on that.

Now you should be able to see all of your nice menu button graphics.


Click on each one and then click on the icon that looks like a little world with a chain on top (it's right next to the "i". A box will pop up and here is where you enter the url of the page you want that particular button to link to. Click OK. Once you are finished doing this to each link, click SAVE. You're done!